
[ad_1]
Summary:
Defaults are now set in Preferences (Edit>Preferences on PC, Lightroom Classic>Preferences on Mac), on the Presets tab:
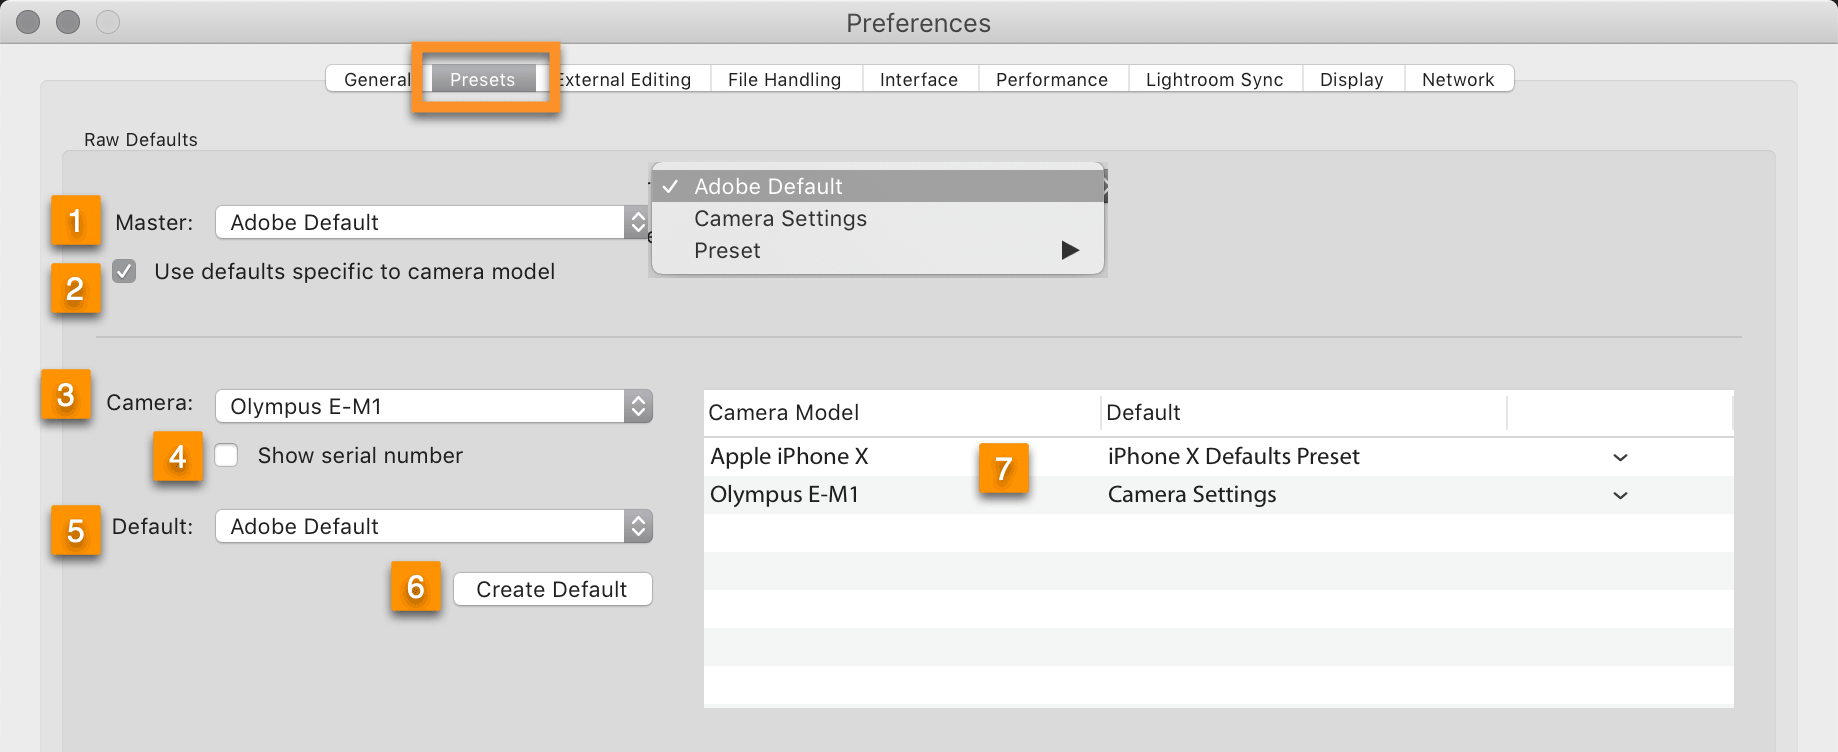
Master (#1 in the screenshot above) is the overall default. If you choose to also specify defaults for specific camera models (#2-#7), Master will apply to raw files you import from any cameras that you don’t list. If you don’t specify defaults for camera models, then Master applies to all raw files you import.
For Master and/or for camera models, choose from:
- Adobe Default: the same defaults as before – Adobe Color profile, all sliders zeroed out except Sharpening – Amount 40, Radius 1.0, Detail 25; Color Noise Reduction 25, Detail 50, Smoothness 50).
- Camera Settings: Lightroom reads from the image metadata what in-camera settings were used that it can, and approximates the look of them. For most cameras this will be reading the in-camera picture style, and applying the Camera Matching profile that mimics it. For a small number of recent new camera models, such as the Nikon Z series, Lightroom will also apply some other in-camera settings – these will affect other Basic and Detail panel sliders.
- Preset: set up a preset applying any edit settings you want to include as the defaults. Note that if your preset does not include Treatment/Profile, the camera-matching profile will be applied – so you can combine Camera Settings and Preset! (To apply the Adobe default color profile, set profile to Adobe Color and include Treatment/Profile in the preset. (For cameras that Lightroom can apply other in-camera settings, if those aren’t included in the preset, camera settings will be applied.)
To set up camera-specific defaults:
- Check “Use defaults specific to camera model” (#2 in screenshot above).
- Choose a camera (#3) – the list includes cameras from all raw files in your catalog.
- To make the default specific to a specific camera serial number, check “Show serial number” and then choose a specific one (#3)
- Choose Adobe Default, Camera Settings or a Preset (#5)
- Click on Create Default (#6)
- To change a camera default or delete it, right-click on it (#7) and choose the appropriate option.
To set defaults by ISO, you’ll need to be comfortable editing code in the presets XMP file. I have created a video tutorial to show this process – you can receive it as one of over 110 videos in my Lightroom 5, 6 and Classic CC: The Fundamentals & Beyond V. 8 video series.
In a nutshell:
- Create a preset with any defaults you want to change that won’t vary by ISO. If none, create a preset and uncheck all the boxes in the Create Preset dialog.
- In the Presets panel, right-click on the preset and choose Show in Explorer/Finder.
- Right-click on the XMP file, choose Open With…, and choose any text editing application.
- In the XMP file, create a new line right before the (last) tag, and paste in the code below. (This is a screenshot. Download a file with the code from Adobe’s help page here.)

- Edit the code as appropriate and then save the file. The code as-is assigns luminance Noise Reduction (i.e. Luminance Smoothing) value 0 to ISO 400 and below; 10 to ISO 1600, and 30 to ISO 6400 and above. Noise reduction for any ISO values that fall in between specified ISOs get interpolated based on exposure values – for example, in exposure values, ISO 800 is half way between ISO 400 and 1600, so ISO 800 images are assigned Luminance Smoothing of 5. You can vary any edit setting by ISO, not just Luminance Smoothing, and you can specify multiple settings per ISO:

To find out what the variable name is for a particular setting, create a test preset with that setting and open that preset in your text editor.
- Close and reopen Lightroom so that it rereads the preset file.
- Assign the preset to defaults in Preferences.
CAUTION: After you’ve added the ISO code to the preset file, if at any point you right-click on the preset and choose Update with Current Settings (to add another setting to your defaults, for example), this will wipe out the ISO code. Save a copy of the preset XMP file in another location so you can recover the ISO code if needed.
[ad_2]
Source link